
Simple but fascinating experiments related to physics and astronomy are listed below! Each experiment follows the scientific method, and uses easy to find objects in your home. Some experiments include free printables to make it even easier!
Sun Experiments
Orbit the Sun Craft
Sun Power
Moon Experiments
Moonlight Demonstration
Moon Crater Activity
Star Experiments
Why Do Stars Twinkle?
Space Models
Demonstrate the distance of the Solar System
How Gravity is curved space
Newton’s Laws of Motion
1st Law of Motion: Inertia experiment
1st Law of Motion: Inertia hat
1st Law of Motion: Magician pull
2nd Law of Motion: Penny Slide
3rd Law of Motion: Balloon Release
States of Matter
Oobleck, the Non-Newtonian Fluid!
Thermodynamics
Make a Balloon Expand with Heat
Immortal Balloon
Refrigerator Balloon
Thermodynamics in Action: Ice Cream in a Bag
Electromagnetic Spectrum: Light
Prism Rainbow
Light Absorption
Refracting Water
Astrophysics… for KIDS?!? That’s right! Science need not be intimidating to any age. We are learning the basics of Quantum physics in our day-to-day life, even as we marvel at the beauty of sunlight. Kids are curious, and curious kids are scientists at heart. We want them to explore, learn, and grow, which often means they want to experiment.
Astrophysics is a big word for studying astronomy and physics, which means learning about space (sun, moon, stars, orbits) and physics (motion, heat, and forces like gravity and electricity). Kids naturally love all these things. Who doesn’t love seeing how hard they can throw a ball or wonder at a starry sky?
Honestly, science experiments occur all the time when you’re a kid— we just don’t always recognize it. Kids are experimenting with physics as they learn what force is needed to crack an egg, throw a ball, or how momentum, gravity, and force work together to land a successful flip off a swing.
As parents, we can help them think a little deeper and learn the scientific process when we walk them through the process of experimentation. They discover that there are methods to find more answers when they understand that each experiment has a purpose, hypothesis, observation, and conclusion. As they find conclusions, they may find more questions, further purpose in their seeking, and more remarkable findings.
BEFORE YOU START
Science experiments can be intimidating, with the potential for a giant mess. If your family is anything like mine, the kids marvel at the experiment only to be instantly sucked into a black hole at clean-up time. For that reason, I suggest you tell your kids they need to help with every part of the experiment, including clean-up. If you have an up-front agreement, you’re more likely to keep them until the end. Then next time you might be excited to do another!
Introducing or rehearsing the Scientific Method for each experiment helps kids grasp the reality of experimentation and how science truly works. Science is NOT opinions by experts or the right answers. Science is the observation, identification, description, experimental investigation, and theoretical explanation of phenomena. Science is a process whereby we learn how the universe is designed, moves, and functions. This process is led by questions, unfolding by experimentation, and course corrected continually as more knowledge is gained.
The Scientific Method is a basic model of how a scientist learns, grows, and gains more knowledge. With each experiment, you can help your students understand the real work of science by employing this method.
The experiments below walk you through the scientific method while doing some really cool stuff! Let’s get started!
Sun Experiments
Orbit the Sun Craft

The earth orbits the sun, meaning it goes in a giant circle through space around the sun. This giant circle causes our seasons and it’s how we measure our year.
The earth also rotates as it orbits. The orbit is the giant circle, but the rotation is the spinning of the earth. The rotation of the earth gives us our days.
Moons also orbit, but instead of orbiting the sun, they orbit planets. Our moon orbits the earth. The moon’s rotation takes the same amount of time as the earth’s, so we only see one side of the moon.
You can observe these phenomena with the simple craft download below!
Print this easy craft to demonstrate how the earth orbits the sun and the moon orbits the earth! All you need is a printer, paper, scissors, and two brad fasteners. Download the FREE PDF below!

Sun Power
The sun is bright, hot, and powerful. It can also be a source of power.
FYI, You can learn lots about the sun in this fun printable: Parts of the Sun.
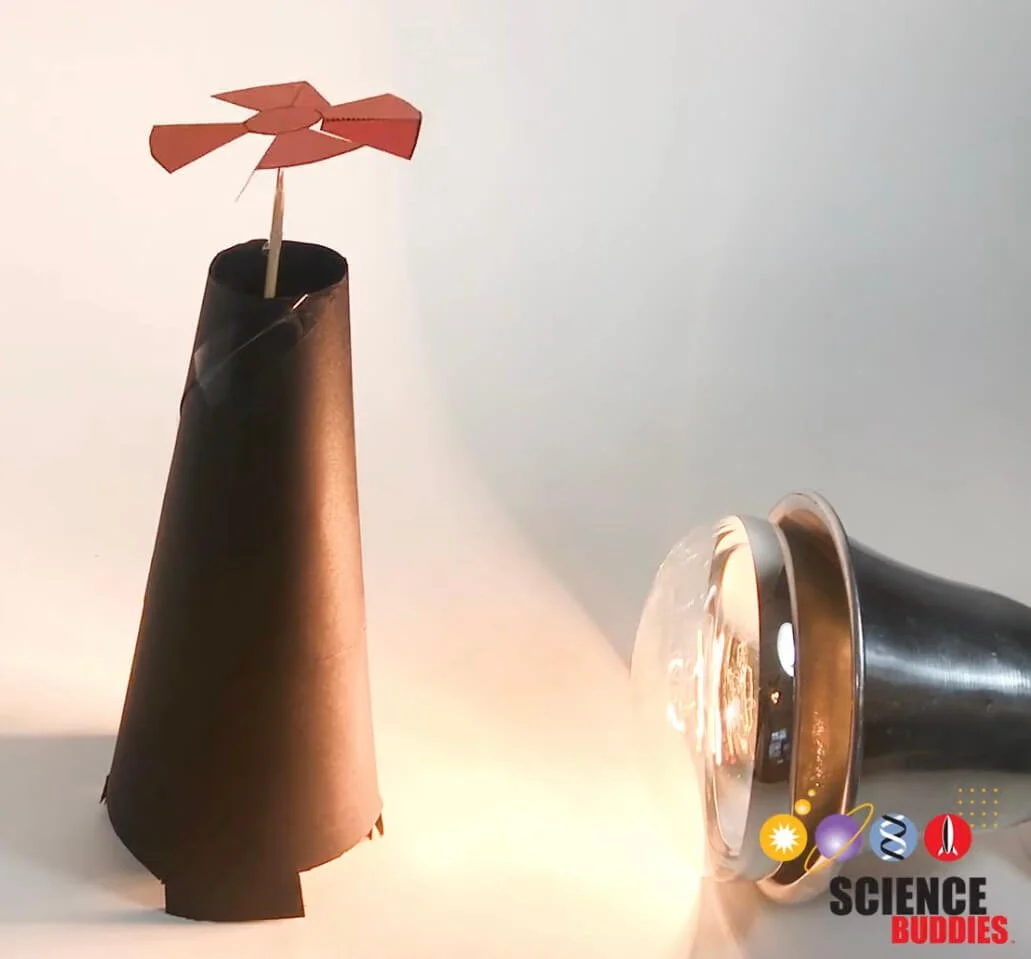
We are going to build our own Solar Updraft Tower! You can watch this video tutorial from Science Buddies for help or follow the instructions below.
Purpose: To see discover how solar heat can also be used as power.
Hypothesis: We are going to build a tower that has a windmill at the top. Instead of putting it in the wind we are going to expose to heat from the sun/ a lamp. What do you think will happen? Why?
Materials:
Black Construction Paper
Scissors
Tape
Pin/needle
Modeling Clay
Pencil or wooden skewer
Needle
Sun facing window on a sunny day, or a Heat Lamp
Thermometer (helpful but optional)
Procedure: Roll a piece of paper into a cone and tape to secure. Use your scissors to cut the base so the cone can stand upright. Your cone should be approximately an inch shorter than your pencil/wooden skewer. The top should be about 2 inches in diameter. At the bottom of the cone, cut 3 evenly spaced rectangles, each 1/2 an inch tall and 2 inches wide. These are air inlets.
Take your wooden skewer or pencil and tape a needle to the top of the pencil.
Next, use modeling clay to form a ball. Insert the pencil/wooden skewer into the modeling clay to hold it upright, with the pin/needle on top.
Create a paper pinwheel from the printable. Download the easy Pinwheel Printable here.
Use a pencil to create an indent in the center of your paper pinwheel. Set the indented center of the paper pinwheel on the tip of the needle. It should be able to move freely.
Observe and Record Results: Now you have your solar updraft tower! Set it in front of a heat lamp or a bright sunny window. If you have a thermometer, measure the temperature outside and inside the tower. Write them down. Leave the tower in the sunlight for 15 minutes, then come back to observe the changes.
What happened after 15 minutes? Take the temperatures in and outside the tower for a second time, and compare to the previous temperatures. Have they changed?
Conclusion: The solar updraft tower draws heat from the sun. Heat rises. Heat flow moves the air creating a circulating windmill on top of the tower. This is one example of how heat from the sun can be used as a power source. Want to learn more about heat and motion? Check out the thermodynamics experiments below!

Moon Experiments
Moonlight Demonstration
Purpose: To discover how the moon gives us light.
Hypothesis: Will the flashlight shining on white paper make a dark room lighter, darker, or the same? Why or why not? What will the light do? Will it just shine on the paper? Or will it reflect or disperse in some way? Make your best guess.
Materials: Flashlight, white paper plate or white paper (you can cut it in a circle to appear moon shaped), and a room that can become dark that also has a closet door or couch.
Procedure: Take a flashlight and a white piece of paper to a dark room. Shine the flashlight onto the piece of paper. Notice how the light reflects off the paper and whether it makes the room brighter or not.
For a second stage, try hiding behind a door or couch to emulate the sun hiding during the night. Set up the flashlight behind the door, and either hold or place the paper a short distance from the couch or door, where the light can reflect off the paper. Have the observers stand on the other side of the couch/door, so they can only see the paper, not the flashlight. Consider what light the illuminated paper is giving into the room.

Conclusion: In the same way that we can see the light from the sun reflecting off the moon even when we can’t see the sun, so the flashlight reflects off the paper and brightens a room even when we can’t see the flashlight.
Moon Crater Activity
Create your own craters. (You may want to do this experiment before making brownies or chocolate cake!)
Materials: Deep dish pan 3 to 5 cups of flour, a 1/4 cup of cocoa powder, a sifter, marbles and pebbles.
Hypothesis: We are going to throw pebbles and marbles into flour. What will happen when it hits the surface of the flour coated in cocoa? What shapes do you think it will make? Why?
Procedure: Pour flour into a deep dish pan and smooth out the surface. The flour should be approximately an inch deep. Next use a sifter to dust the top of the flour with cocoa powder. This will act like the surface of the moon. Take your pebbles and marble and throw them at the surface.
Results: Observe the changes to the surface of the flour/cocoa. Compare the results to a picture of the moon. Ask why the surfaces seem similar. Research if needed.
Conclusion: The marks in the cocoa resemble the craters on the moon. The moon surface is covered with similar craters. The earth has a protective atmosphere that prevents meteoroids and asteroids from landing on the surface of the earth. The moon, however, has an extremely thin atmosphere. Meteoroids and Asteroids frequently land on the moon, and the gravitational pull of the moon actually acts to protect the earth from meteorites.

Star Experiments
Why Do Stars Twinkle?
See a simple video demo of this experiment on Nano Girl’s Great Science Adventures!

Purpose: Observe why stars appear to twinkle in the night sky by simulating the affects of atmosphere on the light from the stars.
Materials: Aluminum Foil, Pen, Bowl of water, Flashlight
Procedure:
Step 1) Poke a few holes in your aluminum foil. Shine the light through the foil. Observe the light.
Step 2) Place the aluminum foil behind a bowl of water, wiggle the bowl a little to get the water moving, then shine the light through the foil into the bowl of water. Observe the light traveling shining through the foil and water.
Observations and Hypothesis: What did you see? Does the light appear different when shining through the foil and the water versus shining through the foil? Why do you think that is?
Compare the light foil to stars shining at night. Do you notice similarities? If so, why?
Conclusion: This experiment shows us how light behaves when it moves though our atmosphere. The water acts like the moving air and particles in our atmosphere. As the light passes through the water we are able to see the light “twinkle”, much like starlight passing through our atmosphere.
Space Models
Demonstrate the distance of the Solar System
This object lesson teaches kids about the vastness of the solar system.
Every image we have of the solar system is squashed into a smaller space to help us see the different planets. This may make us think that the planets are closer than in reality. This demonstration allows you to create an accurate scale of the distance between planets using pre-measured paper— toilet paper!
FYI, doing the planets to scale with the distance is not so easy. The planets on the distance scale below would be invisible.
Materials: A couple rolls of toilet paper, paper and markers.
Cut circles out of paper to create planets and label them Mercury, Venus, Earth, Mars, Jupiter, Saturn, Uranus, and Neptune. (You can use the planet scale on the next experiment if you like.) Find a large space, and count out each of the toilet paper squares as shown in the chart below. This method will have the toilet squares laying in lines beside on another with the sun at the front of the line, and each planet at the end of each line, with Neptune at the end of the furthest line and mercury at the end of the shortest. You can see Sponge Kids picture below as an example.
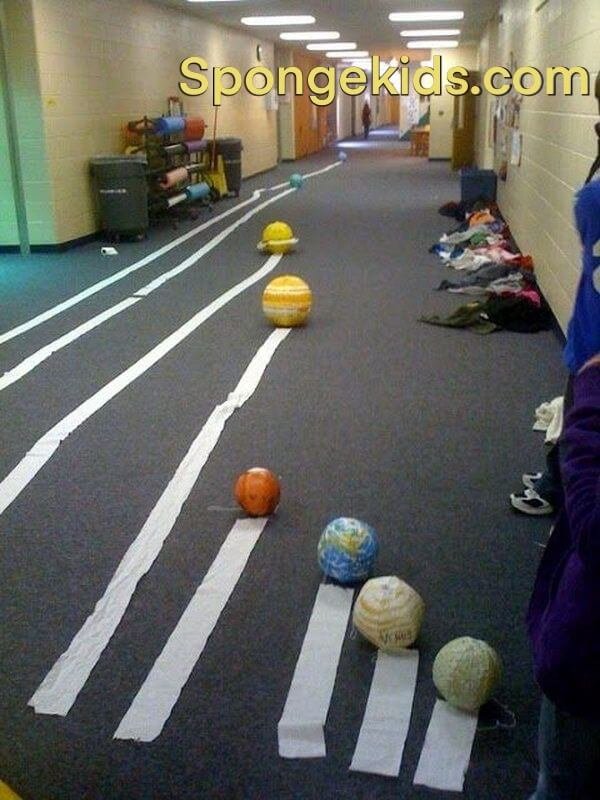
The size of the sun at the scale below is 1/10 of an inch. The smaller planets would be invisible at this scale.

Printable Planets to Scale
Make your own planets to scale to compare the size of the earth to other planets and the massive size of our sun.
You can make the planets out of paper by downloading this form here:
This print allows you to cut out the sun and all the planets using 8.5x11 inch paper. (The sun is made of 6 sheets, though!) Remember, these planets are not to scale with the toilet paper representing the distance between the planets. If you do use the toilet paper and the planets together then be sure to tell your kids that the planet are about 200 times larger than they should be in relationship to the planet distance!
Wanna wow your kids? Check out this fun video of a scaled model of the solar system!

If you want to try other objects like poppyseeds and basketballs, check out these fantastic ideas from The Owl Teacher.
How Gravity is curved space
Purpose: To demonstrate a theory of gravity; that gravity is curved space, and larger objects have greater gravitational pull than smaller objects.
Materials:
Large bowl
Fabric large enough to cover the bowl (like an extra large t-shirt or a bedsheet)
Large Rubber band or string to tie around the edge of the bowl
Marbles and a larger marble or a rock of similar size.
Procedure: Place the fabric over the bowl and pull it taught, placing the rubber band over the top to keep it in place. Now place the ball on top of the fabric. Youʻll see the ball will roll toward the center of the cup. Holding the edges of the bowl, start gently moving the bowl in a circle. The objects will travel and roll around the surface of the fabric, creating orbits. The heavier objects will end up toward the center, and the others on the outer edges. You can imagine the heaviest object as the sun, and the light objects as orbiting planets.
Demonstrate gravity with fun marble runs built from toilet paper and paper towel tubes cut in half and posted onto a cardboard surface. Check it out here!
Newton’s Laws of Motion
1st Law of Motion: Inertia Experiment
Check out a video of this experiment from Science Sparks here! You can also learn all about Newton’s Laws of Motion here.
Purpose: To observe Newton’s first law of motion.
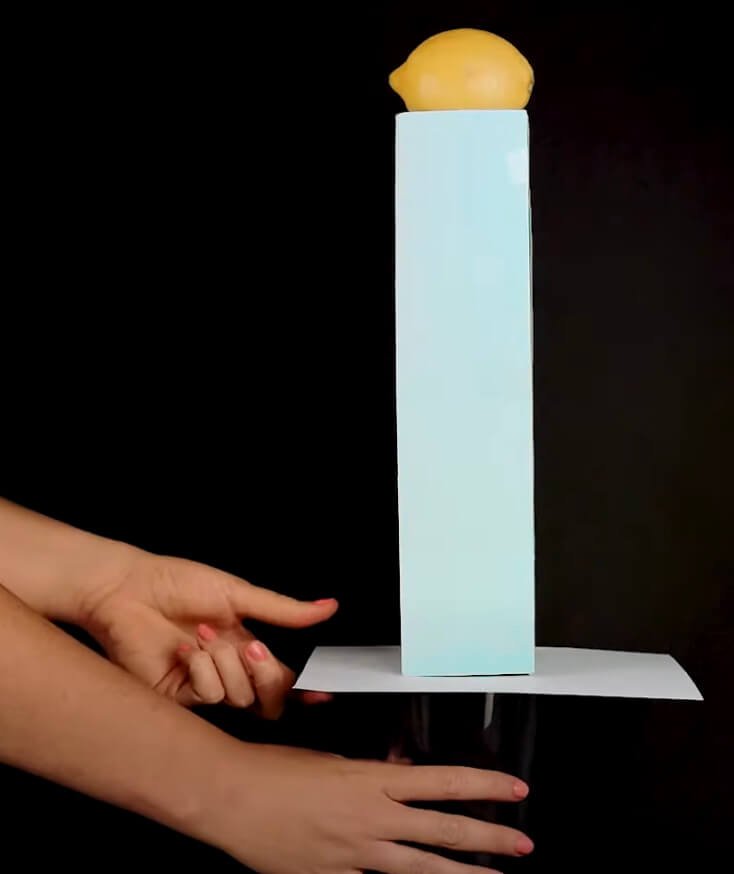
Hypothesis: We are going to stack on object on a tower over a cup. Then we will pull the tower away and observe what happens to the object. What will happen? Why? Use your best guess.
Materials:
Two pieces of paper
Tape
Cup
A few objects that fit in the cup, like an apple, lemon, orange, ping pong ball, etc.
Procedure: Fold the paper into 3rds lengthwise. Tape together to form a triangular tube. Take the second paper (4x6 index card) and place it over the cup. Stack the tube on top of the paper that covers the cup so it is centered over the cup. Put one of your objects on top of the tube. Hold the cup in place, then pull the piece of paper out from under the tube. Observe your results. Ask what happened, and why?
Results: The object at the top of the tower drops straight down into the cup below.
Conclusion: The object at the top is not push or pulled, so it remains in its place, as Newton’s First Law of Motion states: An object at rest will stay at rest. The object remained at rest, though the rest of the objects beneath it were moved. Because there is nothing to combat gravity and hold the object in the air, gravity does its work and pulls it down— straight down in one direction, and directly into the bowl below.
1st Law of Motion: Inertia hat
The following 2 experiments can be seen in this fabulous video by Science Mom. Check it out!

Materials: Wire coat hanger and two tennis balls
Hypothesis: What will happen when the person wearing the hat spins? What will happen when you push one of the balls? Why?
Procedure: Mold a coat hanger into the shape seen above, like a giant M. Attach two tennis balls to the ends. Be sure the shape is evenly balanced so the hat will sit on top of one’s head without tipping to one side.
Observe: Set the center of the “hat” on your head. Spin in a circle. What happens when you spin? What happens when you push a ball? Why?
Results: When the person wearing the hat spins, the hat stays relatively motionless. When the ball is pushed, it spins even though the person wearing it stands still.
Conclusion: Inertia is seen in the first law of motion: an object at rest will stay at rest unless acted upon by an outside force. When the person wearing the hat spins, the balls experience little force, and therefore remain still. The other part of first law of motion is this: An object in motion will remain in motion in a straight line at a constant speed, unless acted upon by an outside force. When a ball is pushed on the inertia hat, both balls begin spinning, continuing in the same direction for quite some time. The only thing slowing the ball will be the friction on top of the head, otherwise it would keep spinning forever.
Download Newton’s 3 Laws of Motion Tutorial PDF here!
1st Law of Motion: Magician pull
Materials: Three bottles, water, and a tablecloth. (Thinner tablecloths work better, as they have less resistance.)
Hypothesis: What will happen when you set water bottles on top of a tablecloth on a table, then pull the tablecloth from under them? What will happen if the bottle is empty? Half-filled? Full of water? Make your best guess.
Procedure: Fill one bottle full of water, the second half full, and leave the last bottle empty. Be sure to tighten the lids on the bottles. Put the tablecloth over your table, and line your bottles across the table. Push each bottle with your hand, and notice how the bottles respond to the force. Do all of them tip over with a tap? Or do some of them stay still? Why?
Next grab the tablecloth and pull it out quickly horizontally to the table, and with great force. What happened? Did any bottles fall over? If so, which ones, and how far? If some didn’t fall, why did that happen?
Observations: The greater the weight an object has, the greater the amount of inertia it possesses. The heavier water bottles will remain stagnant because they have greater inertia. It take greater force to create motion in the heavier water bottles than in the empty bottles.
One thing I noticed when conducting this experiment: If the water bottle was completely full it tipped over easier than when it was 3/4 full. Can you guess why this was? I hypothesize this happened because the bottom of the bottle had more weight than the top, keeping it from being too top heavy and easier to topple. This is an effect of gravity and an example of stability.
2nd Law of Motion: Penny slide
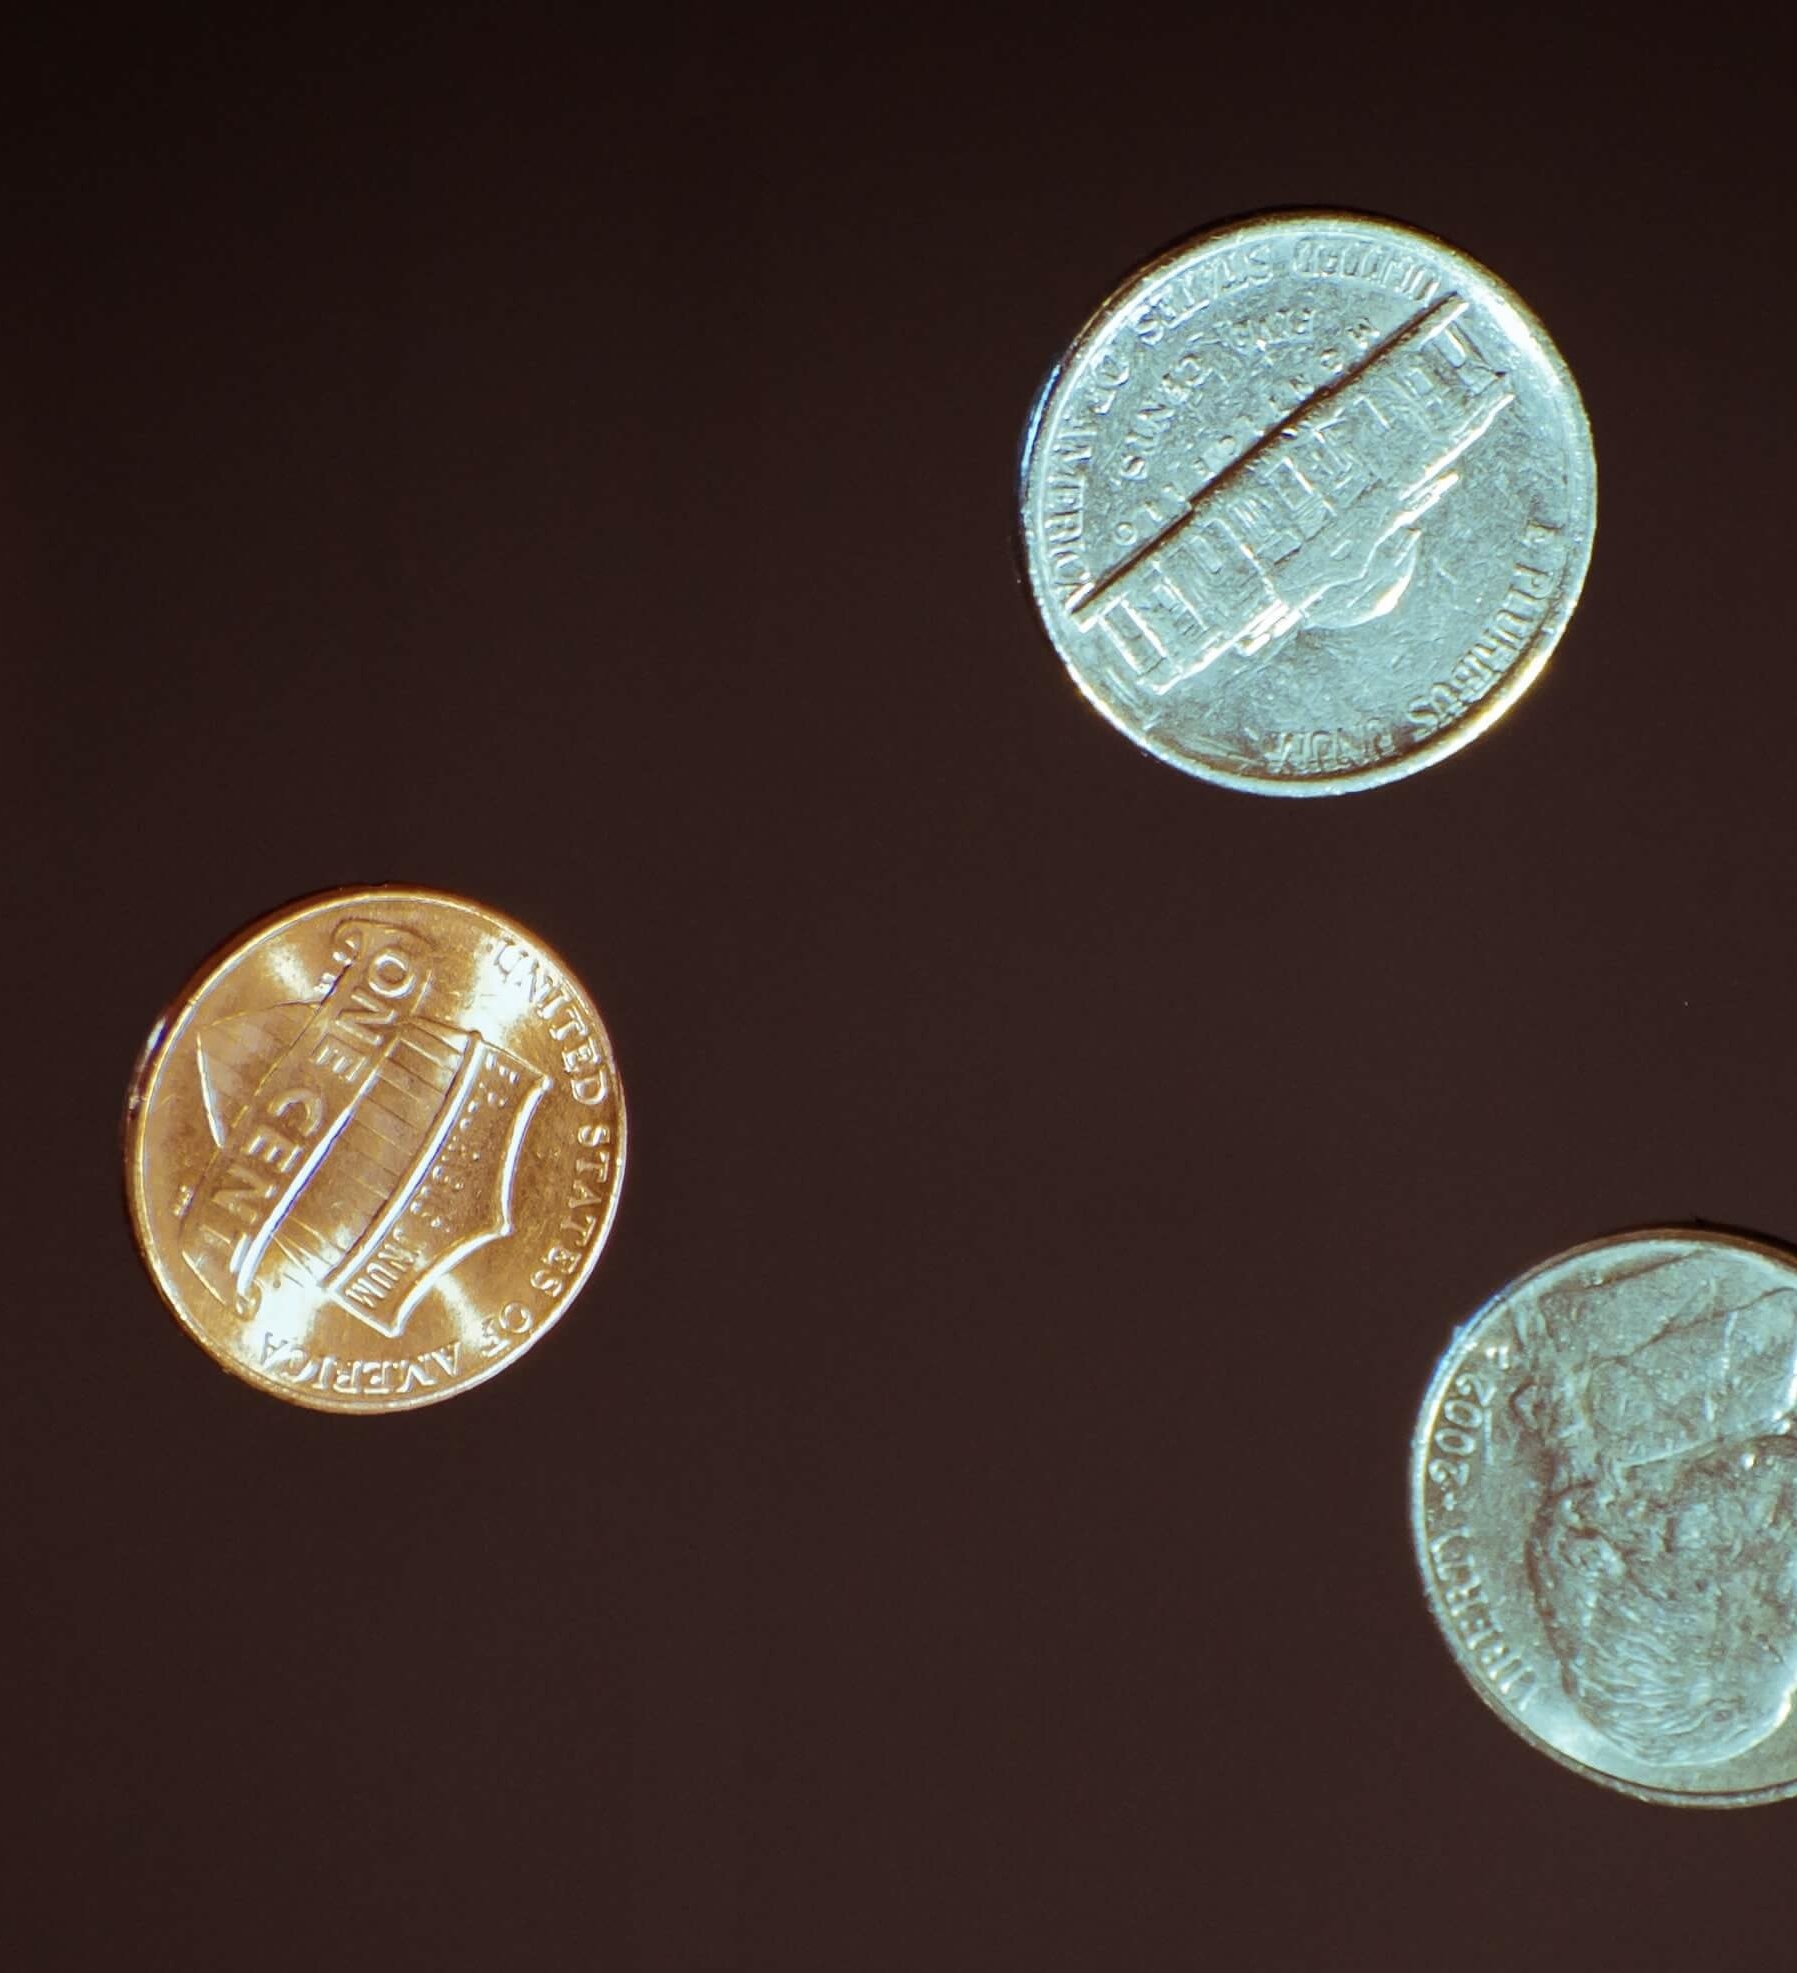
Grab some spare change and set it on a clear table. Try different forces of pushing the pennies, nickels, dimes, etc. across. The table. What happened when you pushed hard? What happened when you pushed lightly? The greater the force, the greater the acceleration, and the further the penny would travel. Try using the same amount of force on a quarter that you use on a dime. Which one goes faster and farther? If you used the same amount of force then the dime would move faster because it is lighter. You will also notice each coin will travel in a straight line— unless it hits something that changes its direction. This confirms Newton’s First Law of motion! To observe the third law of motion, look at what happens when one coin hits another. The coin you hit will transfer its force to the second coin, causing an equal and opposite reaction.
3rd Law of Motion: Balloon Release

Purpose: To observe the 3rd law of motion.
Materials: Balloon
Procedure: Blow up a balloon and hold it closed with your fingers. When the observers are ready, let go of the balloon; but first, hypothesize.
Hypothesize: What will the balloon do? Which direction will it go? Why?
Observe: Now let go of the balloon, watching where the balloon goes. Notice that the balloon travels away from where the air is escaping the balloon.
Conclusion: This is an easy way to observe the 3rd law of motion: Every action has an equal and opposite reaction. As the air escapes the balloon travels the opposite direction.
States of Matter
Oobleck, the Non-Newtonian Fluid!
The states of matter help us understand how matter behaves, but sometimes substances don’t always act precisely like one state or another. Try making this substance, and ask yourself what state of matter it is!
Materials:
1 part water
1 ½ to 2 parts cornstarch
Food coloring (optional)
A container like a cookie sheet, a large bowl, or even a kiddie pool
If you choose, mix some food coloring in your water. Now add the same amount of cornstarch and begin mixing. Continue to add cornstarch until the fluid seems to behave funny, like both liquid and solid.
Try picking it up and letting it run out through your fingers. Try hitting it really hard. Try laying your hand in it and letting it sink in. Make a ball out of it by moving it around in your hands. Once you stop moving, watch it melt out of your hands. Try putting it in a ziplock plastic bag and throwing it around a bit.
The substance you made is oobleck, and it doesn’t fit perfectly in the characteristics of solid or liquid, so we call it a non-newtonian fluid, meaning it doesn’t seem to follow all the standard rules of states of matter. Oobleck behaves like a liquid when you remain still or move very slowly, but the more a force acts upon it, the more it behaves like a solid!
Thermodynamics and Heat Experiments
Thermodynamics is a big word combining the word thermo (meaning heat) and dynamics (meaning motion). The laws of thermodynamics help explain a lot of the activity and function of the entire universe! The laws can seem tricky of complicated, so I wrote a PDF to simplify it for kids in a way that they can understand. Check it out here— free PDF lesson on Thermodynamics for kids.
The following experiments help kids observe principle of thermodynamics with easy to find household objects.

Make a Balloon Expand with Heat
You can see a video of this experiment at this video from Yong Shean Kai.
Purpose: To see how heat rises, and causes kinetic energy in molecules.
Hypothesis: We are going to put a balloon on an empty water bottle and place it in a bowl. What will happen when the hot water is poured into the bowl? Why?
Materials: Hot water, bucket or bowl, a bottle and a balloon.
Procedure: Put balloon on a bottle, and put the empty bottle in the bowl. Pour hot water into the bowl and see what happen to the water bottle.
Results: The balloon will inflate when the hot water is poured into the bowl.
Conclusion: When the hot water is poured into the bowl the heat causes the molecules to move more, causing kinetic (moving) energy. The hot water causes the air in the bottle to heat up. (Remember: Heat always moves from a hotter to a cooler!) The air within the balloon heats up. As it does, the air will rise because heat rises. This forces the air in the bottle up into the balloon.
Immortal Balloon
Purpose: Make a balloon that is resistant to popping! You can see this experiment from The Telegraph.
Materials: Candle and matches, funnel, water, and two balloons.
Procedure: You will make 2 balloons- one with air, another with air and water. Blow up one balloon and tie it. Take the second balloon and blow it up a few times to stretch it a bit. Use a funnel to fill the stretched balloon with some water, blow it up a bit more, and tie it.
Light the candle.
Hypothesis: Take a moment to consider— what will happen to the balloons when they are exposed to heat? Will the one with water in it respond differently to the one without water? Why?
Now take the first balloon, without water, and put it over the flame.
Then take the second balloon with air and water in it, and put it over the flame.
What happened?
Results: The balloon filled with air will pop, but the second balloon will not.
Conclusion: The heat from the balloon causes the air inside it to expand quickly, causing the balloon to pop. However, when the heat from the candle touches the balloon with water, it behaves differently. The water at the base of the balloon will absorb the heat, and the cooler water will shift down to absorb the heat. (This movement of heat rising and cooler lowering is called convection!) The water protects the balloon by absorbing the heat and creating a cooling effect for the balloon.
Refrigerator balloon
Purpose: To demonstrate how cooler atoms slow down and hotter atoms speed up and expand.
Materials: Balloon, string or measuring tape, and a marker.
Procedure: Blow up a balloon. Measure it with your string, making a mark to help you remember its size. Place the balloon. In the refrigerator or freezer. Leave it there for a few hours. Return and measure the size of the balloon again. Compare the size the previous measurement.
Conclusion: Heat causes molecules to move more, (and thus creating more entropy/disorder), and that makes air molecules expand and spread apart. When the air in the balloon cools, the molecules move less, and the balloon will deflate.
-2nd experiment-
If cooler air contracts in a balloon, what will ice do? Try freezing a water bottle, and compare what happened with the water. Hypothesize: will it expand, or contract? Why?
Conclusion: When liquid freezes it forms crystals. The crystalline pattern causes the liquid to expand when frozen!
Thermodynamics in Action: Ice Cream in a Bag
Purpose: To eat ice cream. To discover how the 2nd Law of Thermodynamics- “heat always moves from a hotter to a cooler” helps us make ice cream.
Materials:
½ cup of milk
½ cup of cream
½ teaspoon vanilla or a tablespoon of chocolate syrup
4 teaspoons of sugar
Lots of ice
½ cup salt- rock salt is best
1 Quart size zip and 1 Gallon size ziplock bag
Optional- food coloring
Procedure: Put the milk, cream, vanilla/chocolate syrup, and sugar in the quart size bag. Be sure it is fully and tightly closed! This bag will become your ice cream.
Fill the gallon size bag halfway with ice and ¼ cup of the salt. Place the bag of soon-to-be ice cream in the gallon sized bag. Fill the bag with the extra ice and salt and close it tightly. Holding the ziplock portion of the gallon sized bag, shake the bag for 5 to 10 minutes. Make a dance out of it! After you have thoroughly shaken the bag, take out the ice cream bag, and enjoy! Yummy!
Results: The milk mixture freezes into ice cream!
Conclusion: Salt freezes at a colder temperature than water. As the salt dissolves into the water, the ice melts faster, even though it is still extremely cold. Meanwhile, your warmer milk and cream have heat. Heat always moves from a hotter to a cooler. The heat from the milk and cream was moved to the ice cooling it off. This process is called an endothermic process. It sure is a delicious process!
Seeing the Electromagnetic Spectrum at Work
Prism Rainbow
Purpose: To observe the colors caused by different wavelengths in visible light.
Materials: Sunlight and a prism.
Procedure: Take your prism and hold it up to the sun. Look on the ground to see the rainbow.
Observations: What colors do you see? How did it happen?
Results: Visible white light has all the colors of the rainbow in it. When the light moves through the prism it slows down the waves of light, and they split, revealing the different colors of the rainbow! Raindrops do this with sunlight too, causing the big beautiful rainbows in the sky after a storm.
You may also see a rainbow cause by sunlight shining through your sprinkler on a sunny day!

Light Absorption
Purpose: To see how light is absorbed by different colors.
Hypothesis: We are going to put different colored paper into sunlight, then measure the temperature of the paper. What will the different temperatures be? Will certain colors be warmer or cooler than another, or the same? Why?
Materials: Infrared Thermometer, and white, black, red and blue paper, and sunlight.
Procedure: Lay the four different colored sheets of paper in the sun. After 10 minutes take the temperatures of the paper.
Observations: If the temperatures are the same, try waiting another few minutes to see if the temperatures change. Compare the temperatures. Which color is the hottest? 2nd hottest? Coolest? Why?
Results: The black paper should be the hottest. This is because black absorbs all the colors of sunlight. White should be the coolest, because it reflects all the colors of sunlight. The red may be slightly warmer than the blue. Blue has longer wavelengths, and red has shorter, causing more heat.
Conclusion: Absorption is when sunlight is absorbed, and the colors we see are the colors that are not absorbed. Because black absorbs all colors, it also absorbs the most heat from the sun. White, however, reflects all the colors of sunlight, so it will be cooler.
Refracting Water
Purpose: To observe refraction.
-1st Experiment-
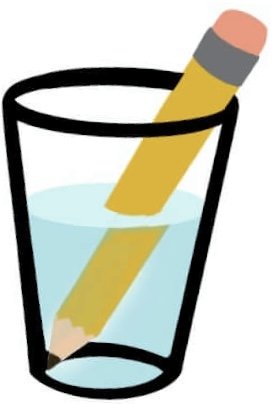
Pour a glass of water, and place a straw or pencil into the water. Observe. What do you notice?
The pencil will appear to have broken in the water. This is called refraction.
-2nd Experiment-
Materials: Bowl, Water, and a coin.
Hypothesis: We are going to put a coin inside a bowl, and look at the bowl without being able to see the bottom. We won’t be able to see the coin. Then we will fill the bowl with water. What do you think will happen? Why?
Procedure: Place a coin at the bottom of a bowl. Sit in such a way as to see the bowl without being able to see the bottom. You should still be able to see the inside of the bowl, but not the bottom or the coin. (See image) Now pour water into the bowl and observe.
Observations: As the water enters the bowl the coin is able to be seen where it was not previously. Why?
Results: The coin will be visible when water is poured into the bowl, where it was not previously able to be seen.
Conclusion: Water refracts light. Because water has a different density than air (I think of density as thickness) the light will travel differently through water than in air. Water bends the light the shines into the bowl. Visible light allows us to see. When the light bends through the water, it bends the image of the coin so we can see it from a new angle.
Laser Diffraction
Purpose: To observe the ways light behaves.
Materials: Laser pointer, plastic bottle, water, sink.
Hypothesis: We are going to point a laser pointer the plastic bottle into the water stream out the other side. Will the laser shine through the water? What will happen to the laser beam in the stream of water? What do you think will happen, and why?
Procedure: Poke a hole near the bottom of your plastic bottle. Cover it with tape. Fill your plastic bottle with water, and set it on the edge of a sink, hole side facing the sink. Get your laser pointer ready, and dim the lights. Point your laser pointer on the backside of the hole, and remove the tape.
Observations: The light from the laser will travel through the water and along the stream of water leaving the bottle. Put your hand in the stream, and you will see the light on your hand.
Results: Light will bend with the stream of water. What is it called when light bends around a corner? Diffraction! The light traveling along the stream of water is called total internal reflection. It reflects inside the water!
Conclusion: Light can diffract, or bend. Light can also be absorbed by the water, . In this case, the light from the laser pointer diffracts, moving along the stream of water, able to bend along the stream of water.
Atoms
Polar Molecules and non-polar molecules
Materials: Large clear jar, water, 2 tablespoon of oil, 10 drops liquid food coloring.
Procedure: Fill the jar ⅔ full with water. In a separate dish Drop 10 drops oil into 2 tablespoon of oil. Pour the oil mixture into the water.
Observations and Results: Watch as you get an underwater explosion of color as the liquid food coloring separates from the oil.
Conclusion: Oil molecules resists water molecules, because water is more dense than oil molecules. The hydrogen in water holds the molecules close together. Oil molecules arenʻt so close together, so they rise above all the water.
Also water is polar, meaning that the hydrogen and oxygen atoms donʻt share electrons evenly. This means the oxygen has a partially negative charge, and the hydrogen atoms have a slightly positive charge. Oil is nonpolar, so its atoms are not attracted to the water. This means that these two substances donʻt want to mix together, because there is nothing to make them attracted to each other.